
If you just picked up the Razer Cobra Pro or you are thinking about it, the Synapse software is where the mouse really comes alive. In this walkthrough I will take you through every major section of the Synapse interface for the Cobra Pro: button customization, macros, DPI stages and polling rates, Chroma lighting, calibration, onboard profiles and power saving. By the end you will know how to configure the Cobra Pro for both competitive FPS play and day to day productivity.
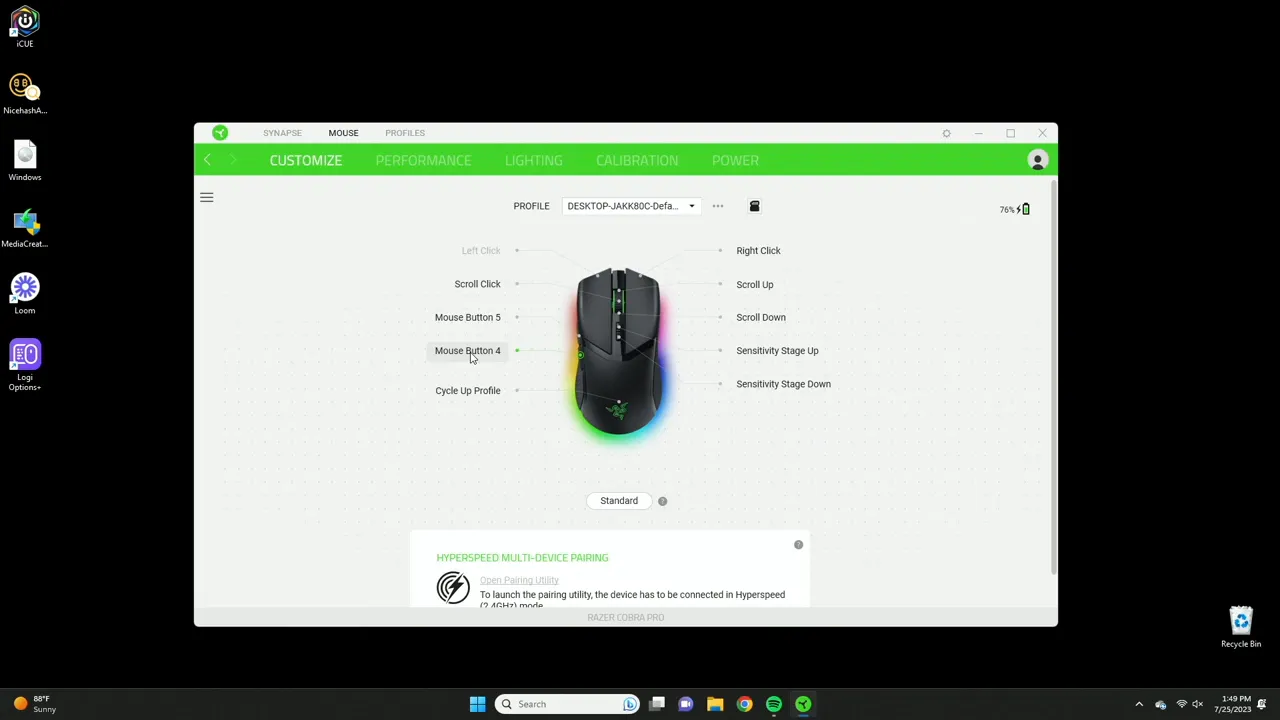
Table of Contents
- Quick overview of the Synapse layout
- Button customization: everything is programmable
- Profiles and onboard memory
- Performance: DPI stages, polling rate and axis sensitivity
- Lighting and Chroma: brightness, effects and smart gaming
- Calibration and sensor tuning
- Power mode and battery management
- Who should get the Razer Cobra Pro and recommended setup
- Tips and little extras
- Can I save profiles to the mouse so I do not need Synapse on every PC?
- What polling rate should I use?
- Do I need Razer Chroma to change lighting?
- How many DPI stages can I set and how should I use them?
- Is Hypershift necessary?
- Final thoughts
Quick overview of the Synapse layout
When you launch Razer Synapse after installing it, this is the screen you are greeted with for the Cobra Pro. The main sections you will use are:
- Customization - assign functions, macros and shortcuts to every button
- Performance - DPI stages, polling rate and axis sensitivity
- Lighting - brightness, effects and Chroma integration
- Calibration and power saving - surface tuning and battery behavior
The interface is straightforward. Click the visual mouse or the tab headings to jump into each area and start customizing.
Button customization: everything is programmable
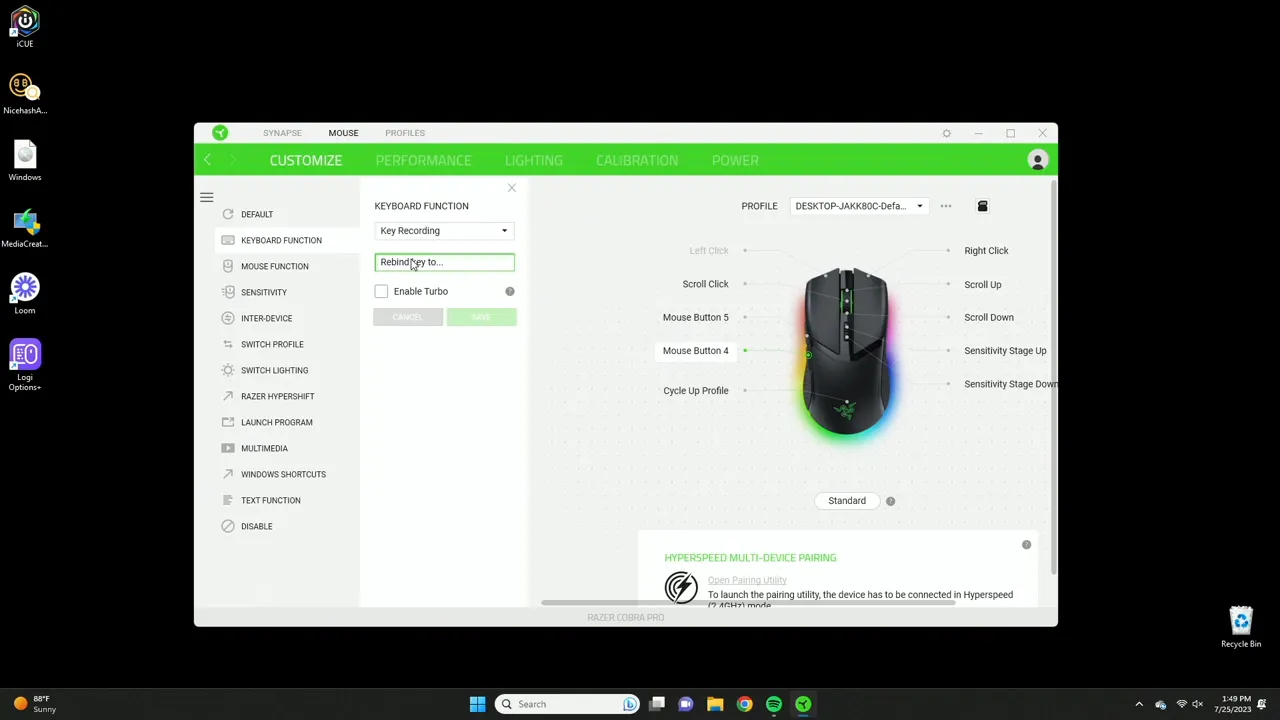
The Cobra Pro gives you full control over every button. Click a button on the visual mouse in Synapse and you will see a long list of options. If you only want the default, you can set it back to Default. Otherwise you can map the button to:
- Recorded keyboard sequences - record an exact sequence like Shift+A or Ctrl+Shift+G and play it back when you press the mouse button
- Single key presses - map to A through Z or 0 through 9
- Mouse functions - left click, right click, scroll up/down and so on
- Sensitivity stages - bind the button to toggle through DPI stages
- Inter-device commands - hold a keyboard key and click the mouse to trigger different sequences when you have multiple Razer devices
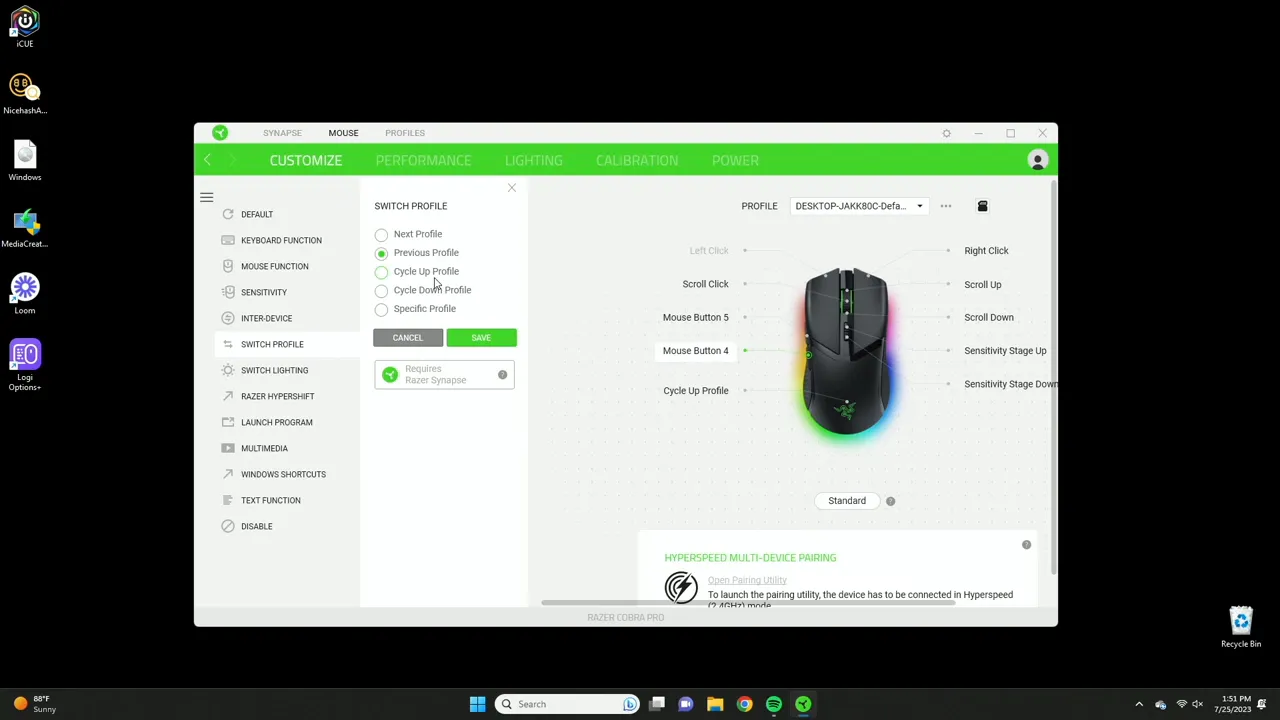
- Profile switching - cycle profiles or jump to a specific profile
- Lighting switching - change lighting profiles (requires Razer Chroma)
- Hypershift - enable a secondary layer of button mappings
- Launch program or website - open an application or URL with a single click
- Multimedia controls and Windows shortcuts - play/pause, mute, open calculator or notepad, etc
- Text function - paste a chunk of text you define
- Disable - turn the button off
Turbo mode is available if you want the button to act like a rapid fire trigger. You can define how many clicks per second or simply map a repeated action.
Hypershift is a powerful feature that effectively doubles your available buttons by letting you hold a modifier to access an alternate mapping layer. It is overkill for many users but very handy when you need multiple shortcut layers for productivity apps or complex games.
Profiles and onboard memory
One standout feature is onboard profile support. That means you can save profiles directly to the mouse and take them with you. In Synapse you just drag a profile to one of the onboard slots and the mouse stores it in internal memory. On the back of the Cobra Pro there is a profile switch button so you can toggle between local onboard profiles and profiles stored on your computer.
This is ideal for traveling players or for switching between a work machine and a gaming PC without reconfiguring everything. You can also configure profile switching to be triggered by a mouse button so you can quickly cycle through or select specific profiles in-game.
Performance: DPI stages, polling rate and axis sensitivity
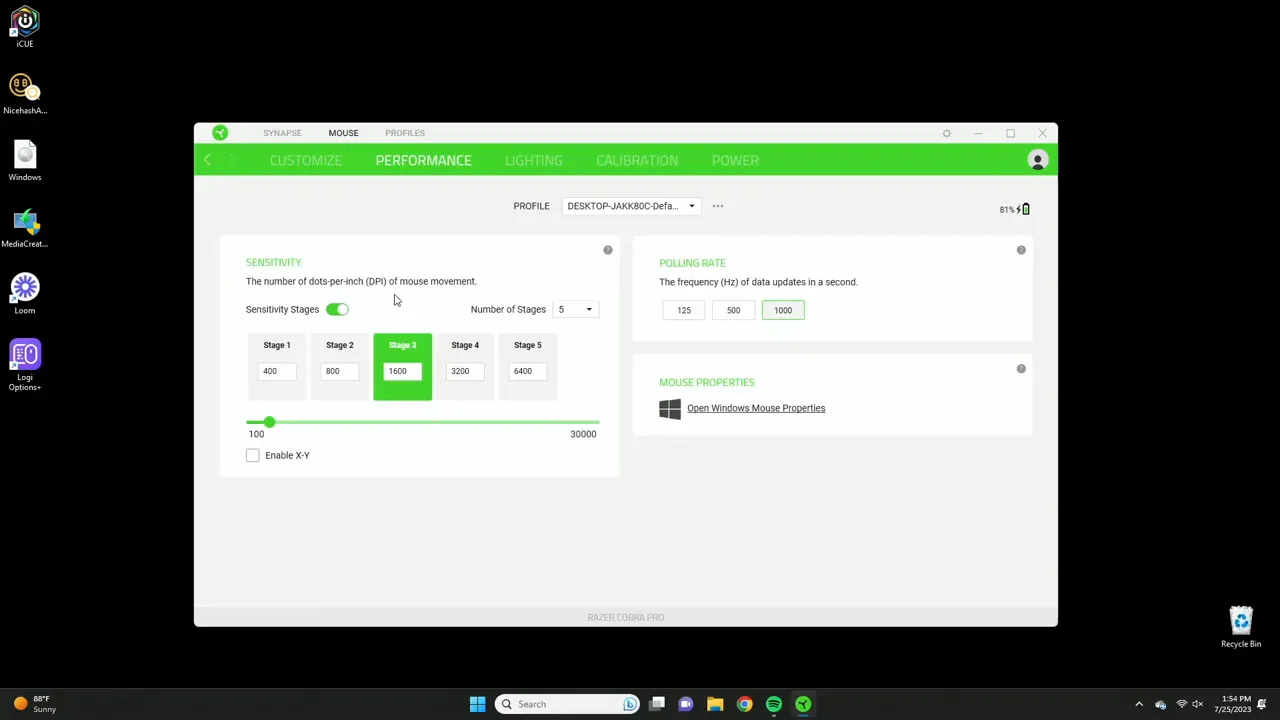
The Performance tab is where you define how the Cobra Pro tracks. A few key things to set here:
- Polling rate - I recommend keeping this at the highest setting. Higher polling rates make the mouse feel smoother and reduce the chance of skipped frames. For competitive play use the top available setting.
- DPI stages - the mouse supports up to five DPI stages. You do not need to use all five. For FPS players two stages often work best: a regular combat DPI and a lower sniper DPI. For productivity you can set stages across a range if you switch between heavy editing and precise work.
- X and Y axis sensitivity - this is a great advanced option. You can tune the horizontal and vertical sensitivity independently. If your vertical movement feels sluggish relative to horizontal movement, bump up the Y axis. If left and right feels too fast, lower the X axis. This level of control helps tailor the sensor behavior to your natural aim and hand motions.
Tinker with the stages so that stage switching is meaningful rather than confusing. Assign a visible indicator or a dedicated stage toggle to make switching intuitive in the heat of an FPS match.
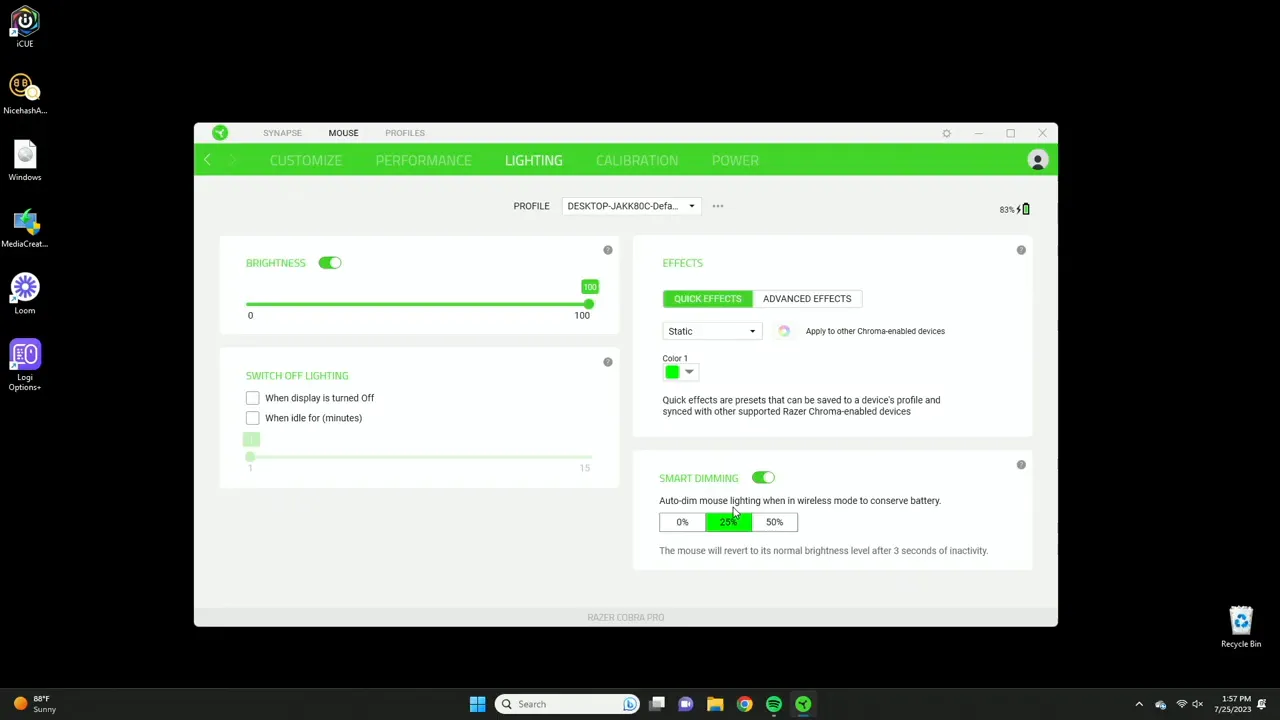
Lighting and Chroma: brightness, effects and smart gaming
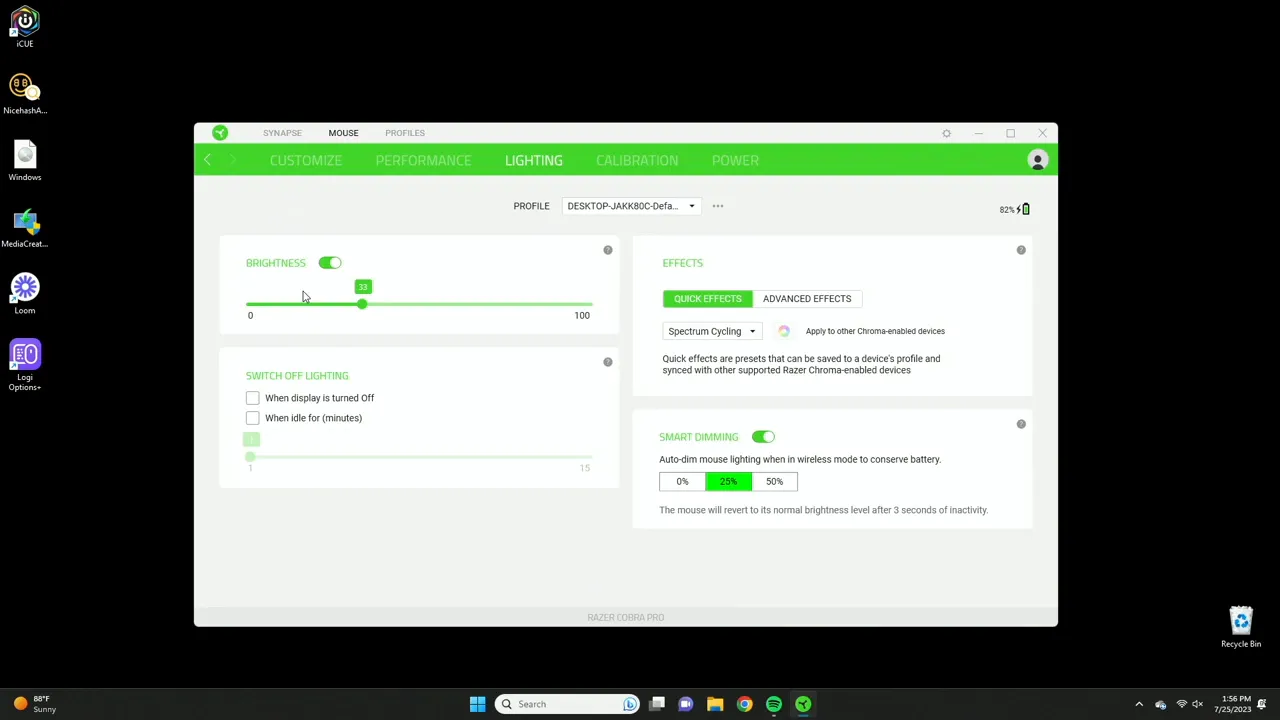
The Cobra Pro has rich RGB options and integrates with Razer Chroma if you want deep customization across multiple devices. In the basic lighting tab you can:
- Adjust overall brightness
- Choose preset effects such as static color, cycling (rainbow), breathing or other built in patterns
- Use Smart Gaming which dims the mouse after a short idle period to save battery when in wireless mode
Turning the brightness to maximum really makes the RGB pop. If you plan to use the mouse wirelessly, consider a middle ground or enable the dimming option so you do not drain the battery too quickly during downtime.
Calibration and sensor tuning
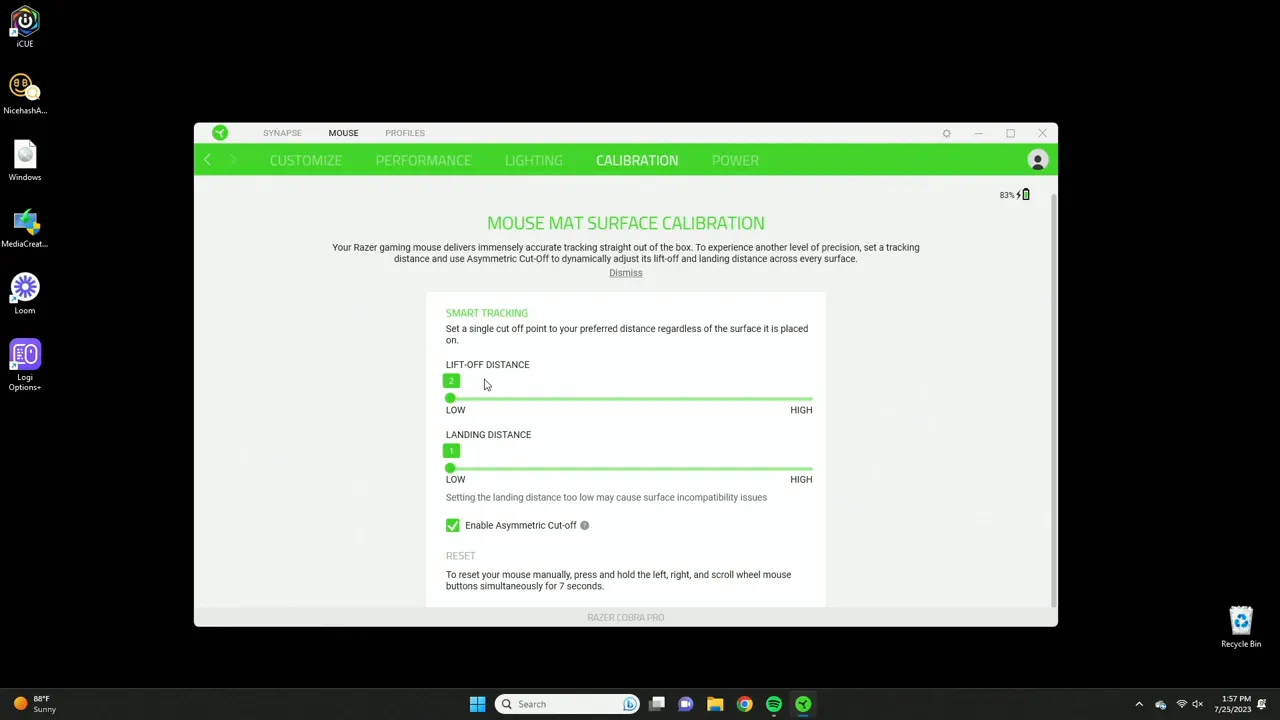
The calibration section lets you tune the sensor to a specific mouse pad or surface. You can set a working area and tweak liftoff distance and landing distance. These are advanced options used primarily by competitive players who want the exact same sensor behavior for every lift and re-placement of the mouse.
For most users the default settings work perfectly, but if you are chasing consistency for precise flick shots or repeated micro adjustments, spend a few minutes calibrating the sensor to your mat. Liftoff and landing distances help prevent accidental cursor movement when you lift the mouse during repositioning.
Power mode and battery management
Power settings allow the Cobra Pro to conserve battery and warn you when battery is low. You can set the mouse to enter sleep mode after a configurable idle time and enable a low power mode when the battery hits a threshold such as 5 percent.
Low power mode typically reduces performance slightly so you will notice laggier movement as a cue to recharge before the mouse powers off completely. This behavior is helpful in wireless mice because it prevents sudden shutdowns during a match or work session.
Who should get the Razer Cobra Pro and recommended setup
The Cobra Pro is ideal for:
- FPS gamers who need a high polling rate, precise sensor and the ability to quickly switch DPI stages for regular play and sniping
- Power users who value macros, multiple profiles and the ability to map common actions or launch programs with a single click
- Traveling players who want to carry profiles inside the mouse and have consistent settings across machines
Recommended starting configuration:
- Set polling rate to the maximum available for the smoothest feel.
- Create two DPI stages for FPS: a high DPI for general movement and a low DPI for precise aim or sniper shots.
- Tune X and Y axis if you feel any mismatch between horizontal and vertical movement.
- Save your main configuration to an onboard profile slot so you can use it on any PC without reloading Synapse.
- Set the lighting brightness to a comfortable level or enable Smart Gaming to conserve battery while wireless.
Tips and little extras
- If you use multiple Razer devices, explore the inter-device bindings so holding a keyboard modifier changes mouse behavior.
- Use Hypershift when you need a second layer of shortcuts; it is great for workflows with lots of commands but not necessary for everyone.
- Use the text paste function to create quick snippets like a common chat message or command if you stream or participate in team games.
- Test liftoff and landing behavior after calibration by lifting and placing the mouse repeatedly to ensure no unexpected cursor jumps.
Can I save profiles to the mouse so I do not need Synapse on every PC?
Yes. The Cobra Pro supports onboard profiles. Drag a profile to an onboard slot in Synapse and the mouse will store the configuration in its internal memory. Use the profile switch button on the back of the mouse to toggle those onboard profiles.
What polling rate should I use?
Use the highest polling rate available for the smoothest response, especially for competitive play. Higher polling rates reduce latency and minimize skipped inputs. If battery life is a concern, you can experiment with lower rates but for responsiveness keep it at the top setting.
Do I need Razer Chroma to change lighting?
You can change basic lighting and brightness directly in Synapse. For deeper multi-device synchronization and advanced effects you will need Razer Chroma installed. Chroma unlocks more detailed customization options across your Razer ecosystem.
How many DPI stages can I set and how should I use them?
You can configure up to five DPI stages. Most users benefit from two or three stages. For FPS gamers two stages often suffice: an everyday DPI and a lower sniper DPI. Use additional stages for more variety if you switch between different tasks like photo editing and gaming.
Is Hypershift necessary?
No. Hypershift is optional. It creates a secondary layer of button mappings when you hold a modifier. It is useful if you need many shortcuts without adding physical buttons, but many users will not need it for normal gaming or office workflows.
Final thoughts
The Razer Cobra Pro paired with Synapse offers a deep level of customization without feeling overwhelming. The combination of onboard profiles, full button remapping, axis-specific sensitivity tuning and Chroma lighting makes it suitable for both competitive gamers and power users. If you want a mouse that adapts to multiple workflows and travels easily with stored profiles, the Cobra Pro is a strong choice.
If you want to dive deeper into hardware performance or see the full review details, try pairing this guide with hands-on testing to fine tune the DPI stages and axis sensitivity to your play style. With a few minutes of setup you can have a mouse that feels personalized and performs consistently across systems.


