If you picked up the Razer Cobra wired gaming mouse, you probably want to get the most out of it. The real power lives in Razer Synapse. In this guide I walk through the Synapse dashboard, show how to remap buttons, set DPI stages, tweak lighting with Chroma, use Hypershift to double your controls, calibrate the sensor, and more. I keep things practical with real settings I use and why they matter for both gaming and productivity.
Table of Contents
- Quick outline
- Getting started: The Synapse dashboard
- Button remapping: Make every click count
- Mouse functions and DPI stages
- Profiles, Hypershift, and inner device combos
- Performance settings: Polling rate and responsiveness
- Chroma lighting and advanced effects
- Calibration for mouse pads and surfaces
- Useful workflow tips and real-world examples
- Final thoughts and who this mouse is for
- FAQ
- More visuals
Quick outline
- Overview of Razer Synapse dashboard
- Button remapping and keyboard functions
- Mouse functions and DPI stages
- Profiles, Hypershift, and inner device shortcuts
- Performance settings: polling rate and sensitivity
- Chroma lighting and advanced effects
- Calibration for mouse pads and final recommendations
- FAQ
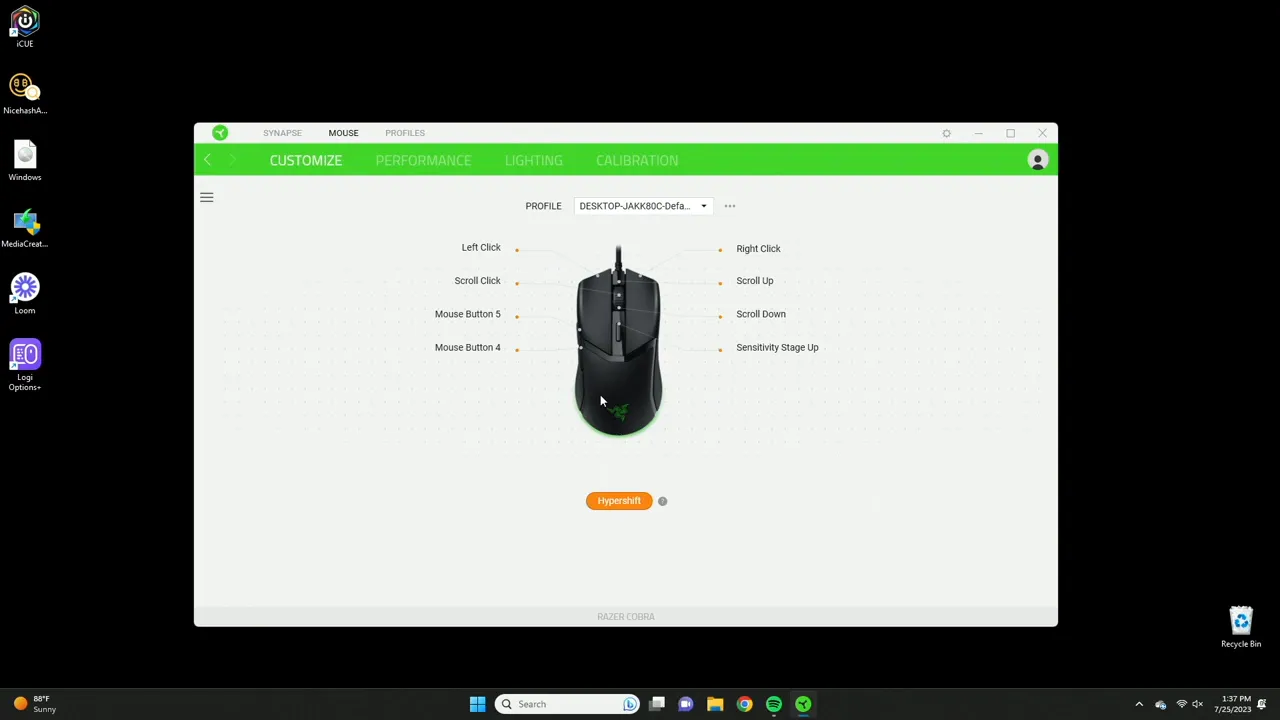
Getting started: The Synapse dashboard
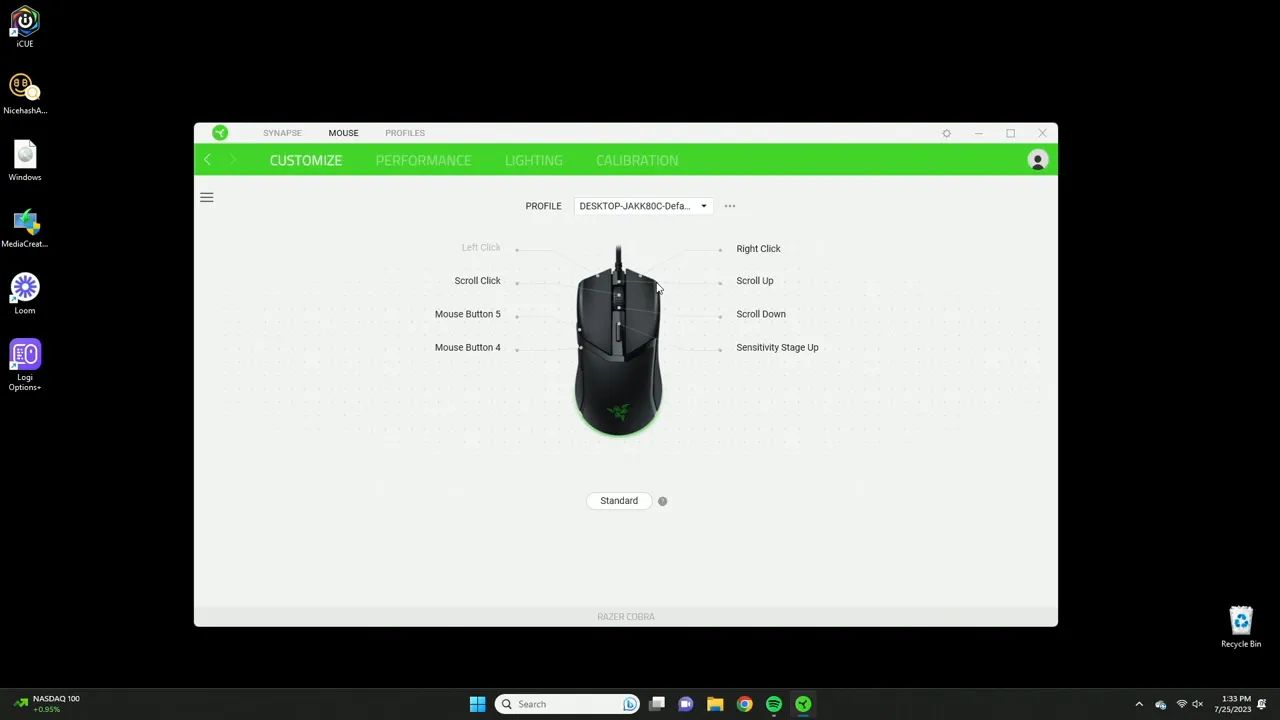
Once Synapse is installed you land on a clean dashboard that puts your mouse buttons front and center. From here you can click any button graphic — left, right, middle click, the scroll click, or the two side buttons (button 4 and button 5) — and assign new functions. This is the hub for everything: remapping, macros, lighting, profiles, and performance.
Button remapping: Make every click count
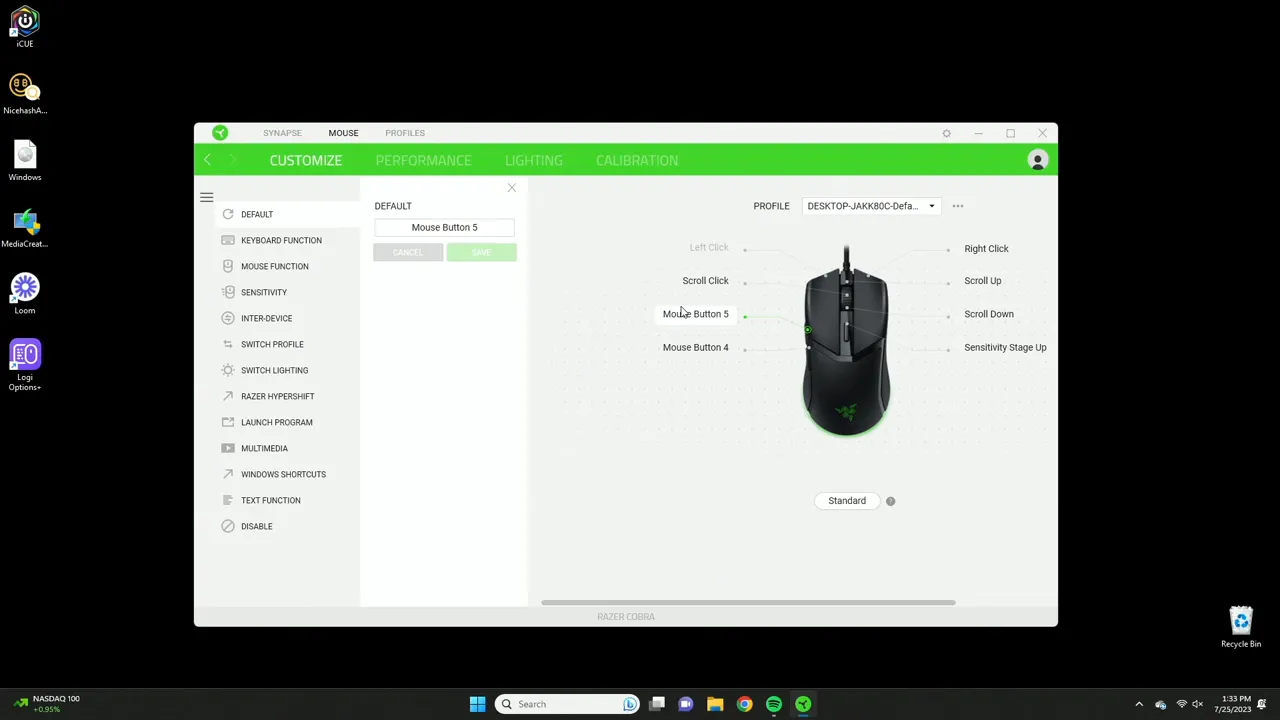
The remapping options are extensive. You can assign simple things like forward and back for web browsing, or complex macros and key recordings. Key recordings let you map alphabet keys, numbers, function keys (F1 to F24), modifiers like Shift, Ctrl, Alt, and even turbo mode which repeatedly triggers the macro while you hold the button.
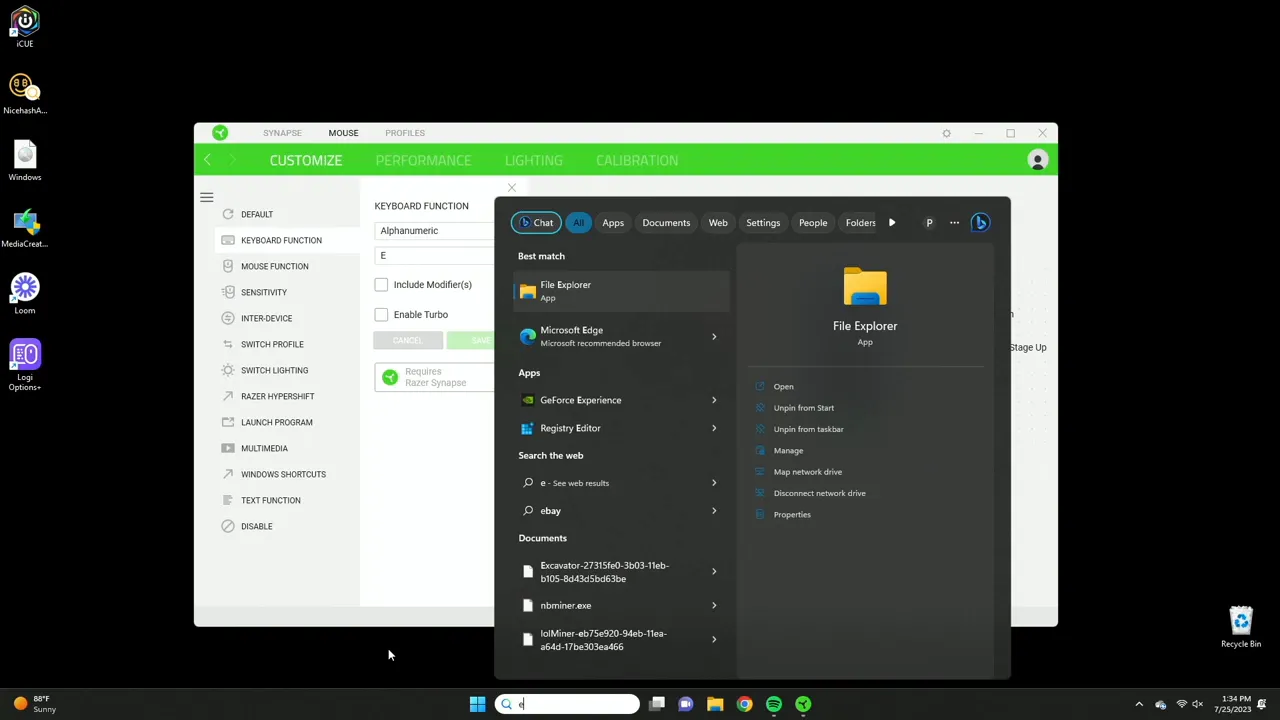
For example, set your side button to send the letter E if you want a one-click keybind. Or use a modifier plus key so a single side button acts as Shift+E or Ctrl+V. Turbo mode is handy for rapid-fire actions in games, and you can control how many repeats it does.
Keyboard functions and extras
Synapse exposes the full keyboard set: number pad, navigation keys (arrow keys, Home, End), common Windows shortcuts (launch Calculator, Notepad, etc.), multimedia commands (next, previous, mute), and text macros. Text function is useful for productivity: paste a commonly used phrase or even emojis with a single click.
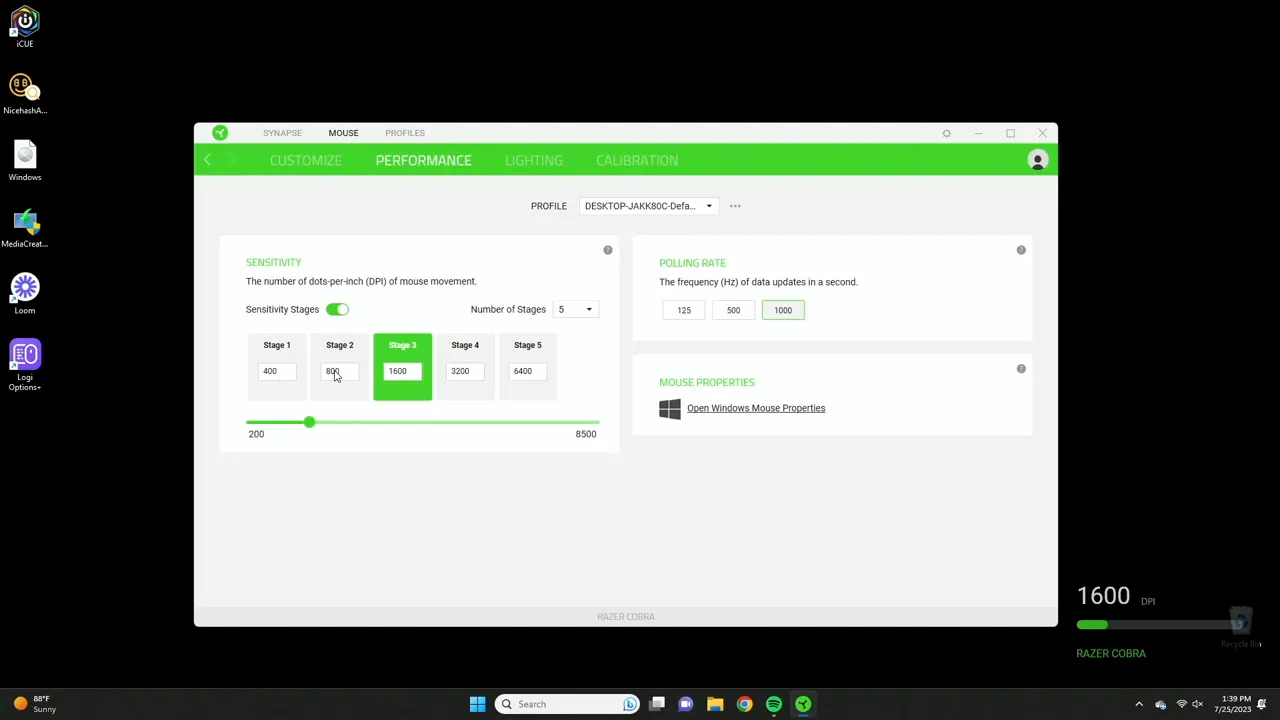
Mouse functions and DPI stages
On the Mouse functions side you can assign sensitivity changes (DPI up/down), on-the-fly sensitivity toggles, cycle through DPI stages, or set single-stage increase/decrease. These map directly to the DPI switcher button on the Cobra so you can switch sensitivity mid-game without opening software.
The Performance tab is where you define those stages. The Cobra supports up to five DPI stages. I personally like 1600 DPI for general productivity because it feels fast enough for desktop work but still precise. For gaming, you may prefer lower DPI for aiming precision and higher DPI for fast flicks. A common approach is to have a slower stage for scoped aiming and a faster stage for general movement.
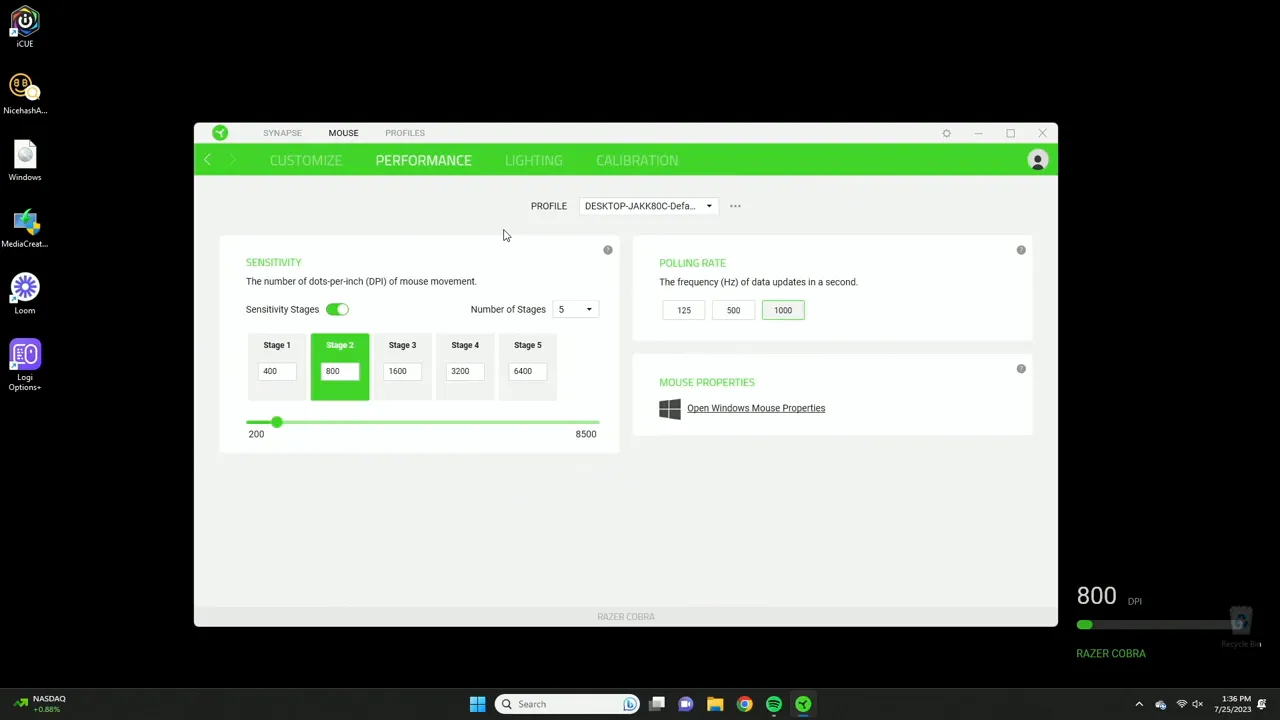
Practical DPI setup examples
- Productivity: 1600 DPI for smooth desktop navigation and precise cursor movement.
- FPS gaming: 400 or 800 DPI for aim precision, with stage 2 at 1600 for fast movements.
- Hybrid setup: five stages ranging from 400 to 3600 to cover sniping and quick reactions.
Profiles, Hypershift, and inner device combos
Profiles let you store multiple button layouts and performance settings. Add profiles per game or per application so you can instantly switch without opening Synapse. You can cycle profiles or assign a single button to select a specific profile with one click.

Hypershift is a standout feature. It gives you a second layer of mappings. Think of Hypershift like holding down a modifier that transforms your mouse into a new device: every button can have an alternate function while Hypershift is active. This effectively doubles the number of actions you can assign to the mouse without adding physical buttons.
Inner devices lets you combine inputs from multiple Razer devices. For example, you can create a shortcut that requires a keyboard modifier and a mouse click, or synchronize actions between a Razer keyboard and the Cobra mouse.
Performance settings: Polling rate and responsiveness
Polling rate defines how often the mouse reports its position to your PC. The Cobra supports high polling rates; I recommend setting it to 1000 Hz for the most responsive feel. At lower polling rates you might notice lag or skipped inputs during fast movements.
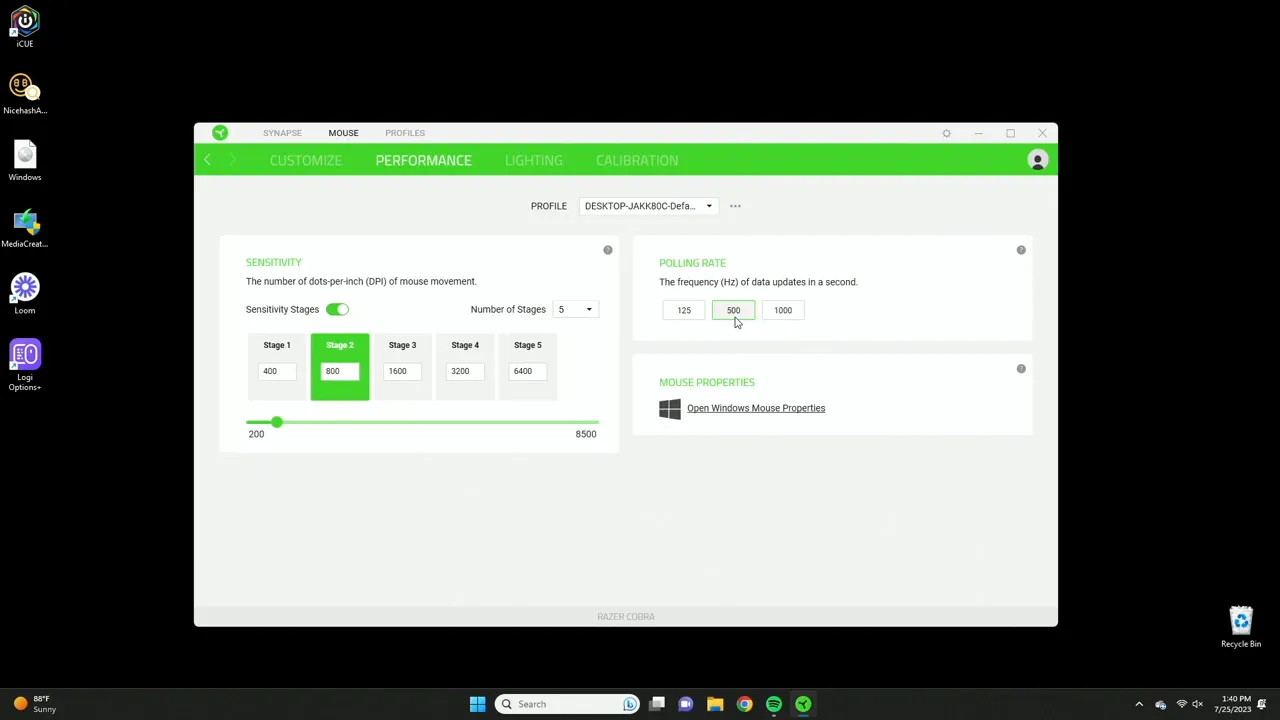
Other performance-related options include on-screen DPI indicators and stage cycling behavior. Use a combination of polling rate and carefully chosen DPI stages to match your play style. For example, snipers often want lower DPI and high polling rate, while twitch players prefer higher DPI and the same high polling rate for responsiveness.
Chroma lighting and advanced effects
The Cobra has RGB on the logo and underglow. Synapse offers quick effects: static color, breathing transitions, spectrum cycling, and other presets. You can set a static green, a green-to-blue breathing effect, or dive into Chroma Studio for full customization and game-sync effects. Advanced effects are where you can craft layered animations and per-zone controls if you want more than the presets.
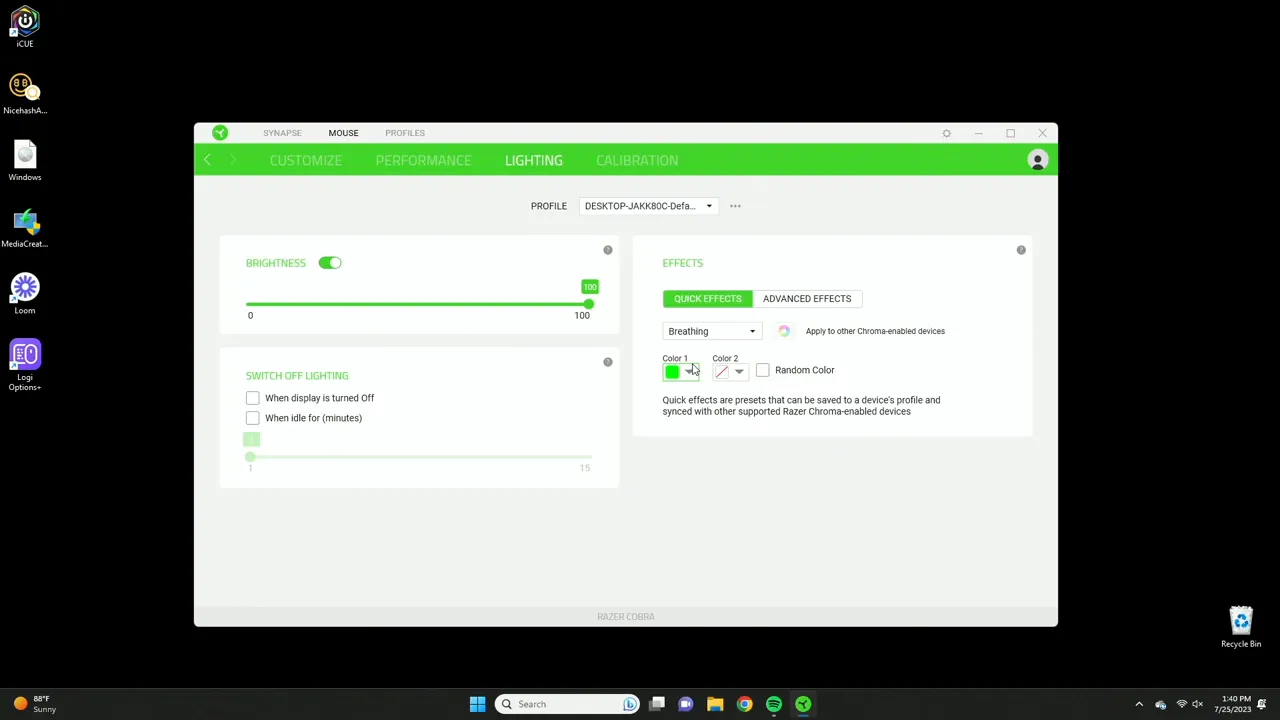
There is also a power-saving option that turns lights off when the display sleeps or after a period of inactivity. This is useful to reduce unnecessary power draw and extend the lifespan of the LEDs.
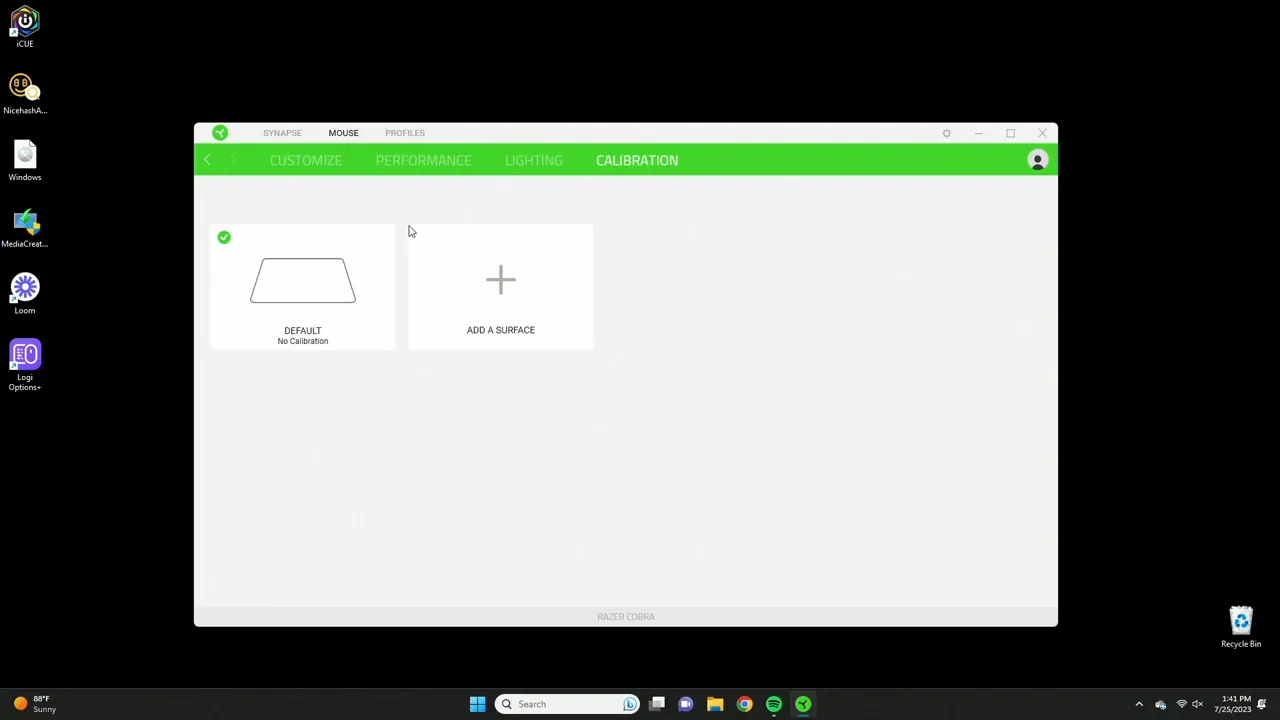
Calibration for mouse pads and surfaces
Calibration tunes the optical sensor for the surface you use. If you have a Razer mouse pad the software often lists it so you can apply a tailored profile. Even if you do not, the default surface usually works fine. Calibration can reduce jitter and improve tracking stability, especially on cloth or textured pads.
Useful workflow tips and real-world examples
Here are some setups I use and recommend:
- Browser navigation: Map the two side buttons to Back and Forward for quick tab browsing.
- Productivity macros: Use the text function to paste email signatures, code snippets, or commonly used phrases.
- FPS loadout switching: Map weapon wheel or item bindings to Hypershift layer so a single side button cycle toggles your gear.
- Sniper vs hipfire DPI: Use a DPI stage dedicated to scoped shots and another for general movement, then toggle with the DPI button on the fly.
Remember: set the polling rate to 1000 Hz, pick sensible DPI steps, and use Hypershift for overflow controls instead of crowding a single layer with too many macros.
Final thoughts and who this mouse is for
The Razer Cobra with Synapse is great for players who want a lightweight mouse with powerful customization. The button remapping, Hypershift layering, precise DPI stages, and Chroma customization make it flexible for both gaming and productivity. If you value on-the-fly DPI switching and want to assign macros or text snippets to mouse buttons, Synapse makes that straightforward.
For most users, the default settings work fine out of the box, but spending 10 to 15 minutes customizing profiles and DPI stages will make the mouse feel far more personal and efficient.
FAQ
How do I change the DPI stages on the Razer Cobra?
Open Razer Synapse, go to the Performance tab and set your DPI values for each stage. You can have up to five stages. Use the mouse's DPI switcher to cycle through them on the fly, or map increase/decrease actions to side buttons.
What polling rate should I use?
Set the polling rate to 1000 Hz for the most responsive performance. This reduces perceived input lag and keeps motion tracking smooth during fast gameplay.
What is Hypershift and how do I use it?
Hypershift is a secondary mapping layer that activates when you hold a designated Hypershift key. It effectively doubles your usable buttons by assigning alternative functions to each button while Hypershift is active.
Can I launch programs or websites with mouse buttons?
Yes. Use the Launch Program action to point to an application or paste a website URL. When the button is pressed, Synapse will open the assigned program or site.
Do I need a Razer mouse pad to calibrate the sensor?
No. Calibration works on the default surface as well, but Synapse includes presets for specific Razer pads which may improve tracking on those surfaces.
Can I assign text or emojis to a button?
Yes. Use the Text Function to type any text or include emojis. Pressing the mapped button will paste that text where your cursor is focused.
More visuals
Below are snapshots of the main Synapse pages so you know where to look when customizing your Cobra.
Take a few minutes to experiment with Hypershift, lighting, and DPI stages. Small adjustments can make a big difference to comfort, accuracy, and workflow. Enjoy customizing your Cobra.


