Hi — I'm Kova Tech. In this guide I walk you through the Razer Synapse software specifically for the Razer Viper Mini. If you own the Viper Mini (or are considering it), Synapse unlocks everything from button remapping and DPI tuning to RGB effects and mouse-pad calibration. Below I’ll break down every tab, show practical examples, and share tips so you can get the most out of your mouse.
Table of Contents
- Quick overview: What Synapse gives you for the Viper Mini
- Getting started: the Synapse main screen
- Sensitivity & performance: DPI stages and polling rate
- Profiles and application linking
- Razer Hypershift: a second layer of controls
- Lighting & Chroma: color, effects and sync
- Calibration: liftoff distance and pad tuning
- Utility functions worth trying
- Tips & best practices
- Final thoughts
- Frequently Asked Questions
- Where to go next
Quick overview: What Synapse gives you for the Viper Mini
Synapse is where the Viper Mini becomes more than just a lightweight gaming mouse. Out of the box the mouse works fine, but Synapse lets you:
- Remap buttons and assign keyboard shortcuts, macros, or utility functions.
- Create multiple profiles and bind them to specific games or apps.
- Enable Hypershift — a whole secondary layer of button mappings.
- Tune DPI stages and polling rate for different sensitivity needs.
- Customize Chroma RGB lighting, sync effects across Razer devices, and set idle timers.
- Calibrate lift-off distance to specific Razer mouse pads for consistent tracking.
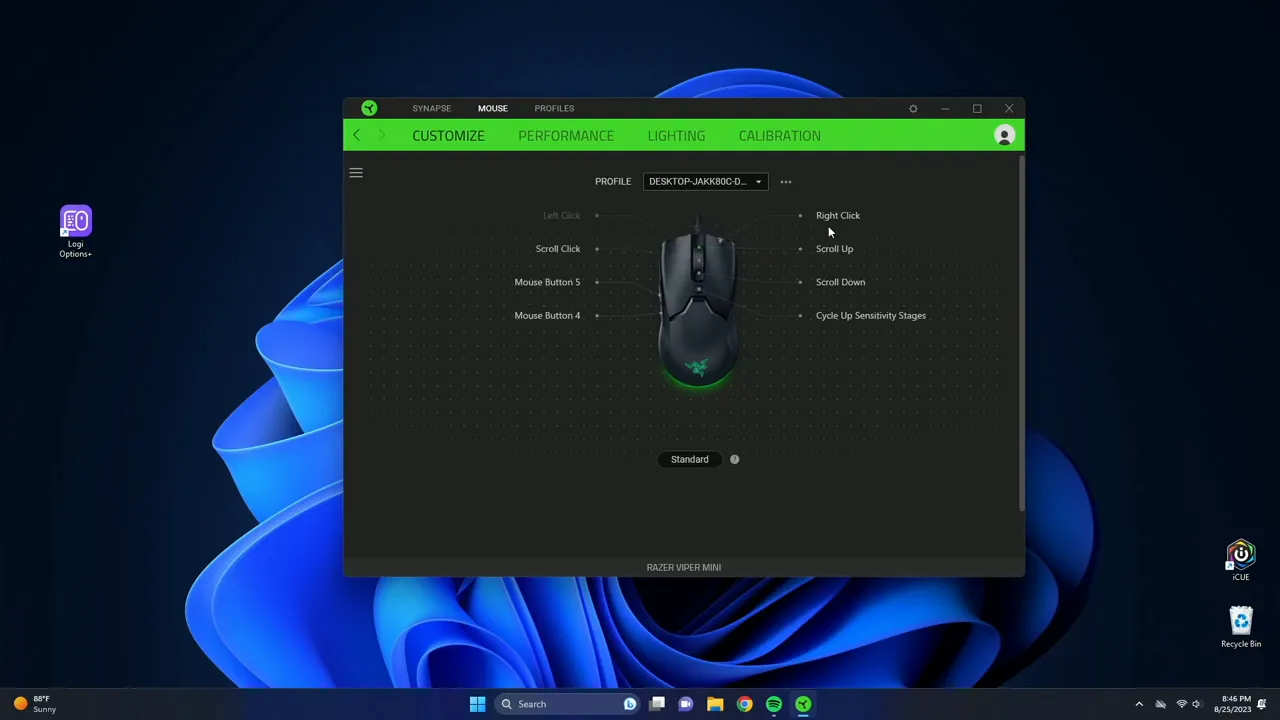
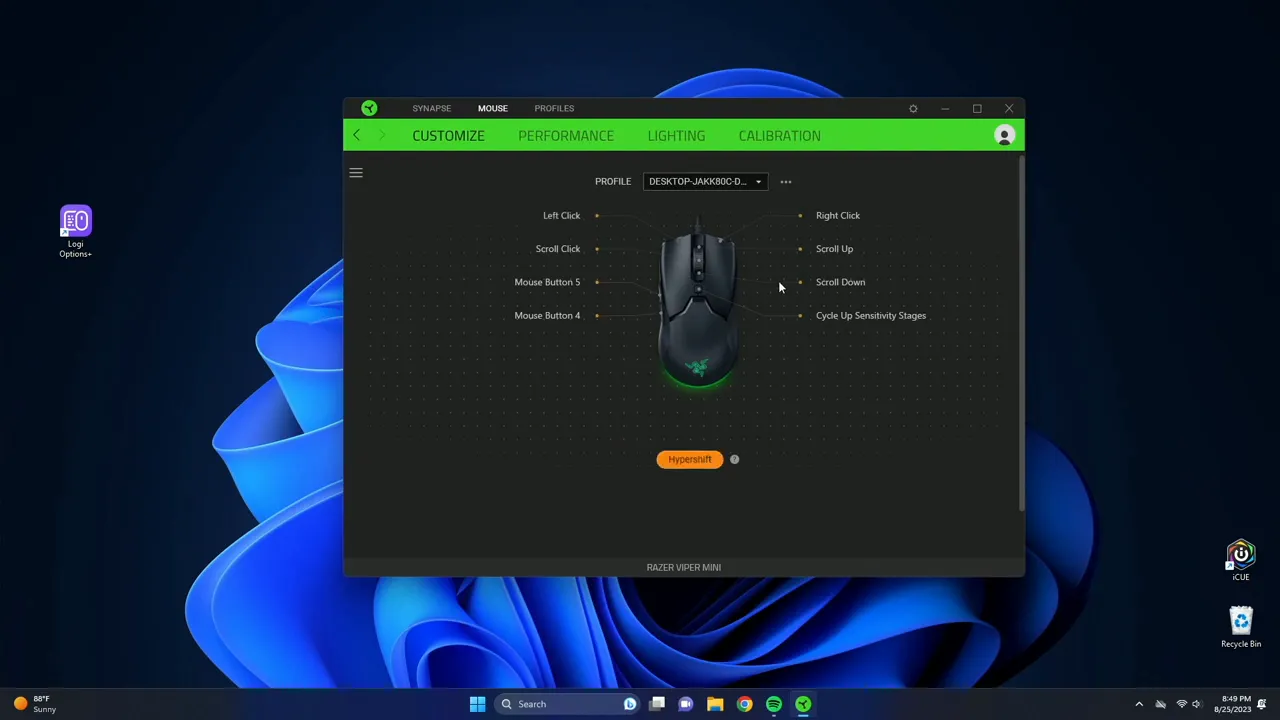
Getting started: the Synapse main screen
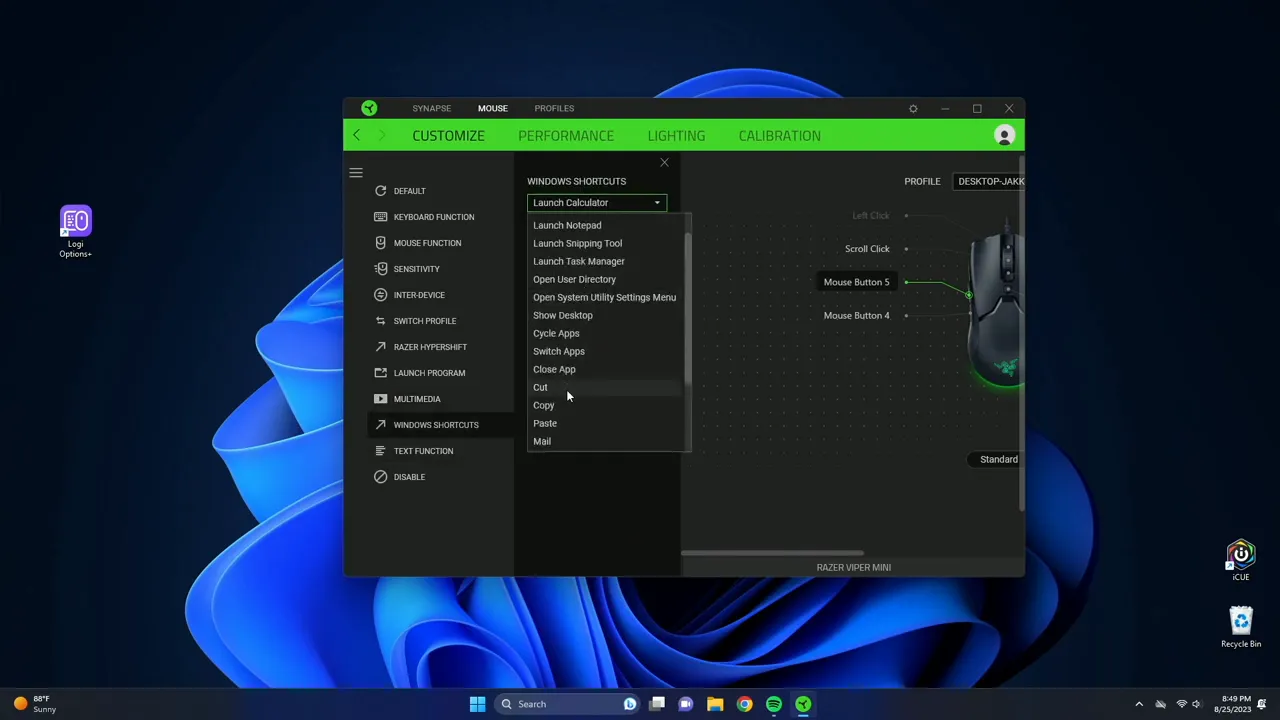
When you open Synapse you'll see a graphic of the mouse and clickable labels for each programmable button. Click any white text over the mouse graphic to edit that button's function. The interface is straightforward: pick a button, choose a function category, and configure the details.
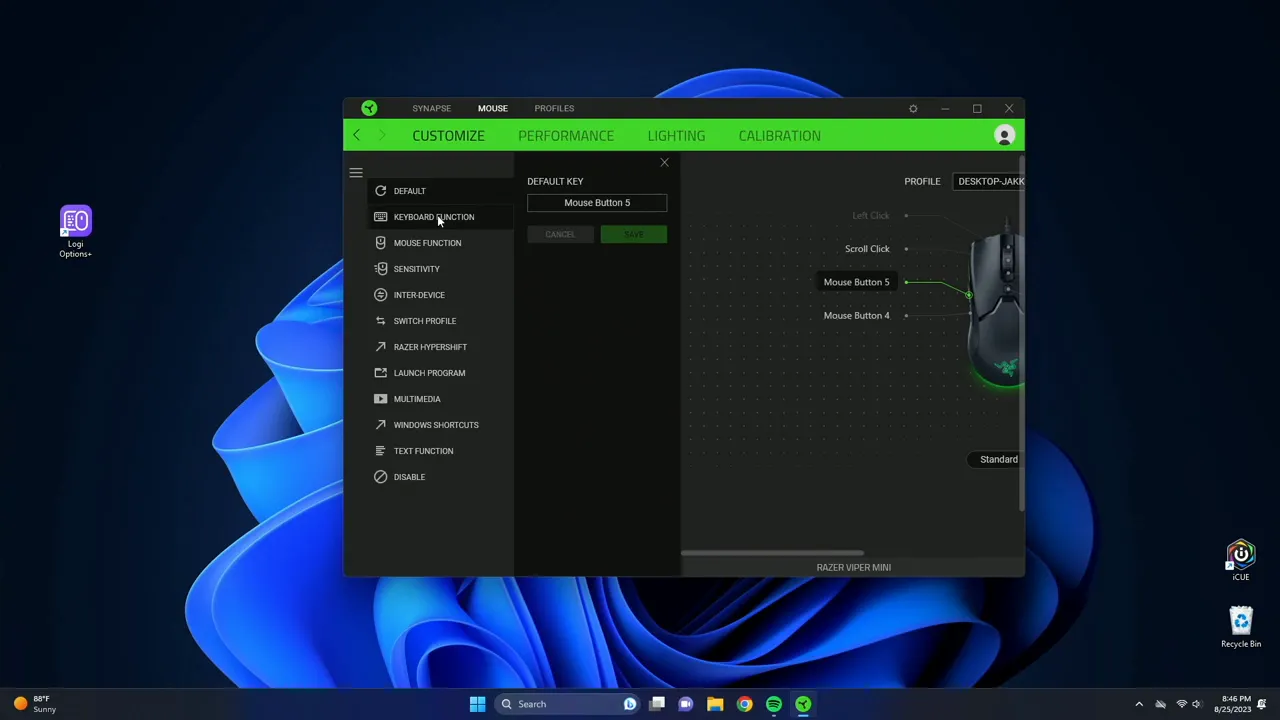
Button remapping — practical examples
Every button can be set to a wide range of actions. Here are the most useful ones you'll likely use:
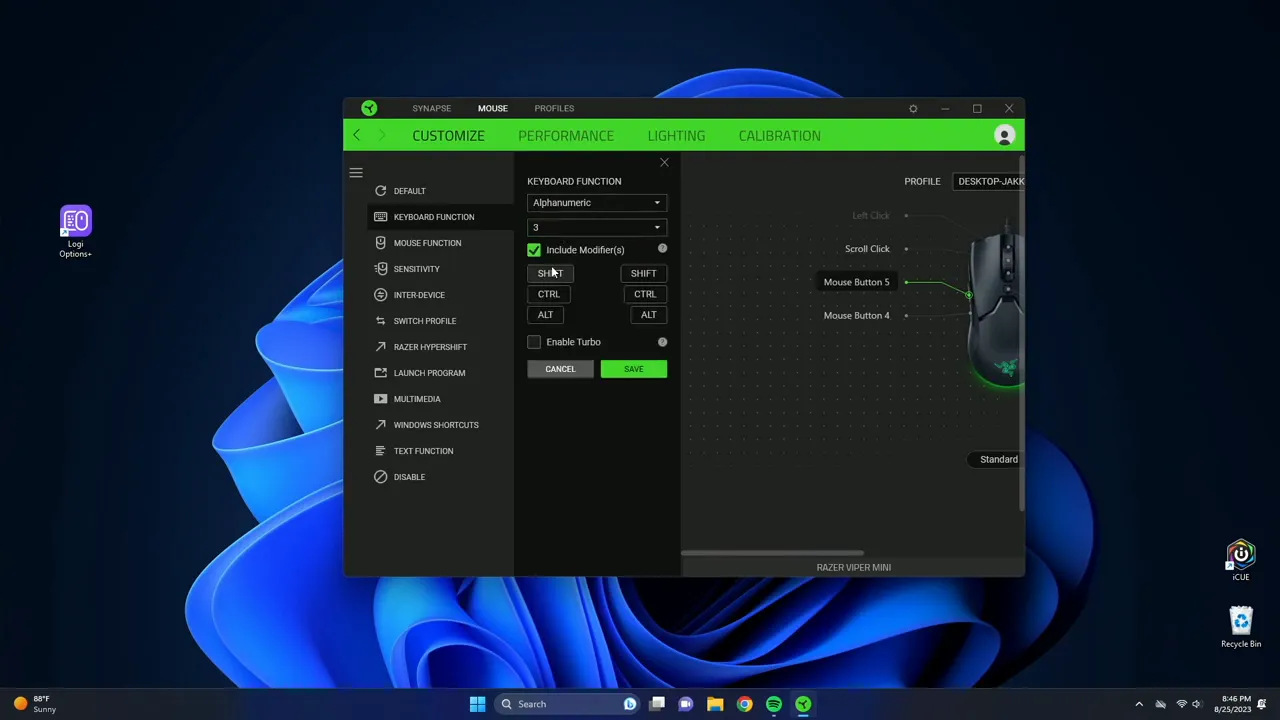
- Keyboard key — assign a single key like "3" so pressing a mouse button sends that keystroke.
- Mouse functions — standard left/right/middle click, or other mouse actions.
- Turbo mode — repeat a key or mouse click multiple times at a fast rate. Synapse lets you spam up to 20 times per click — handy for certain game mechanics where repeated input is needed.
- Modifiers — bind combinations like Shift + 3 or Ctrl + 5 to a single mouse button.
- Launch program / website — open an app or URL directly from a mouse click.
- Windows shortcuts — utility commands like copy, paste, close app, refresh.
- Text function — type a snippet or message with one click, including emojis and special characters.
- Disable button — turn off an accidental or unwanted button.
Example: I assigned Mouse Button 5 to send the "3" key. With turbo enabled plus a modifier (e.g., Shift), you can instruct it to send that key multiple times automatically. This is a surprisingly useful trick when you need to spam an input during gameplay.
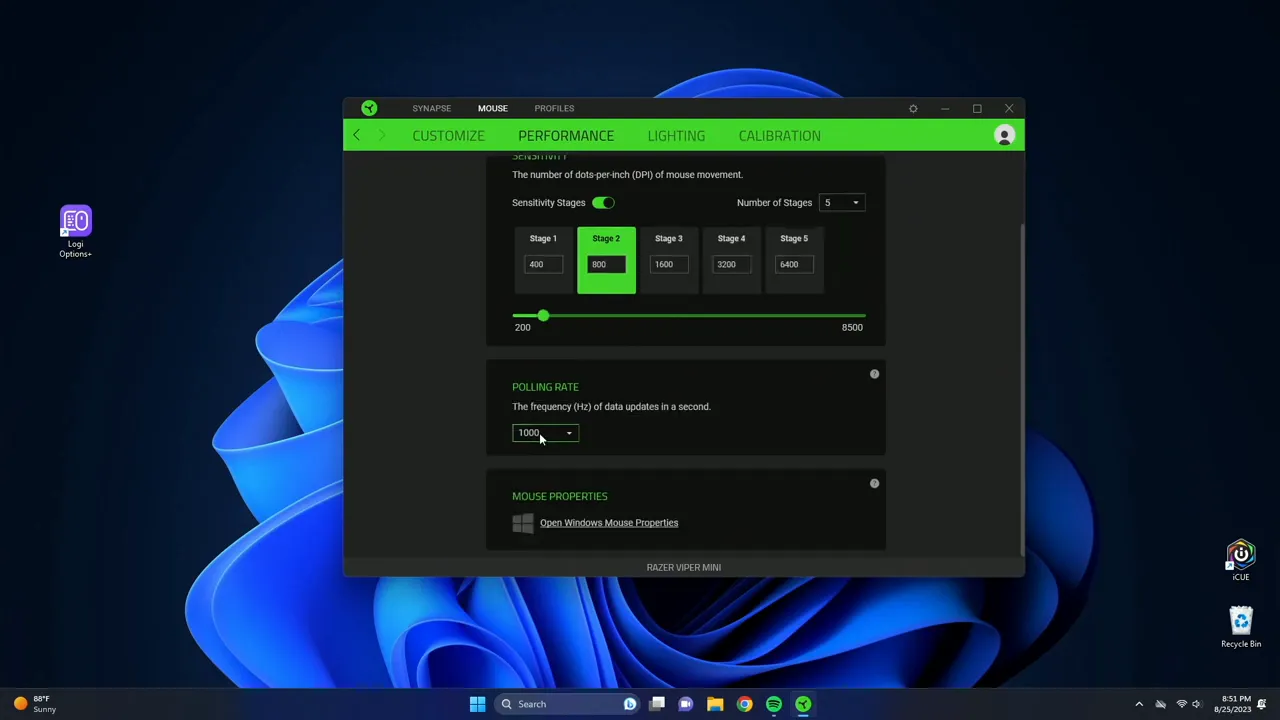
Sensitivity & performance: DPI stages and polling rate
Sensitivity is where you tune how the mouse moves across your screen — Synapse exposes DPI stages and lets you cycle between them with a button.
- DPI stages — set multiple DPI levels (for example 400, 800, 1600). Use the DPI switch to cycle between them on the fly. If you prefer only two speeds, reduce it to two stages for simplicity.
- Polling rate — this controls how often the mouse reports its position to your PC (Hz). I recommend keeping it at 1000 Hz so your mouse doesn't lag or skip during fast inputs.
Small adjustments here can make large differences in aim feel, especially in competitive shooters. Use increments that make sense to your muscle memory rather than jumping wildly between values.
Profiles and application linking
Profiles let you store distinct configurations. For example, I have a "Valheim" profile that loads whenever I launch that game. To set this up, click the profile, add the binding, and choose the executable to link it to. Once the game launches, Synapse will automatically switch to that profile.
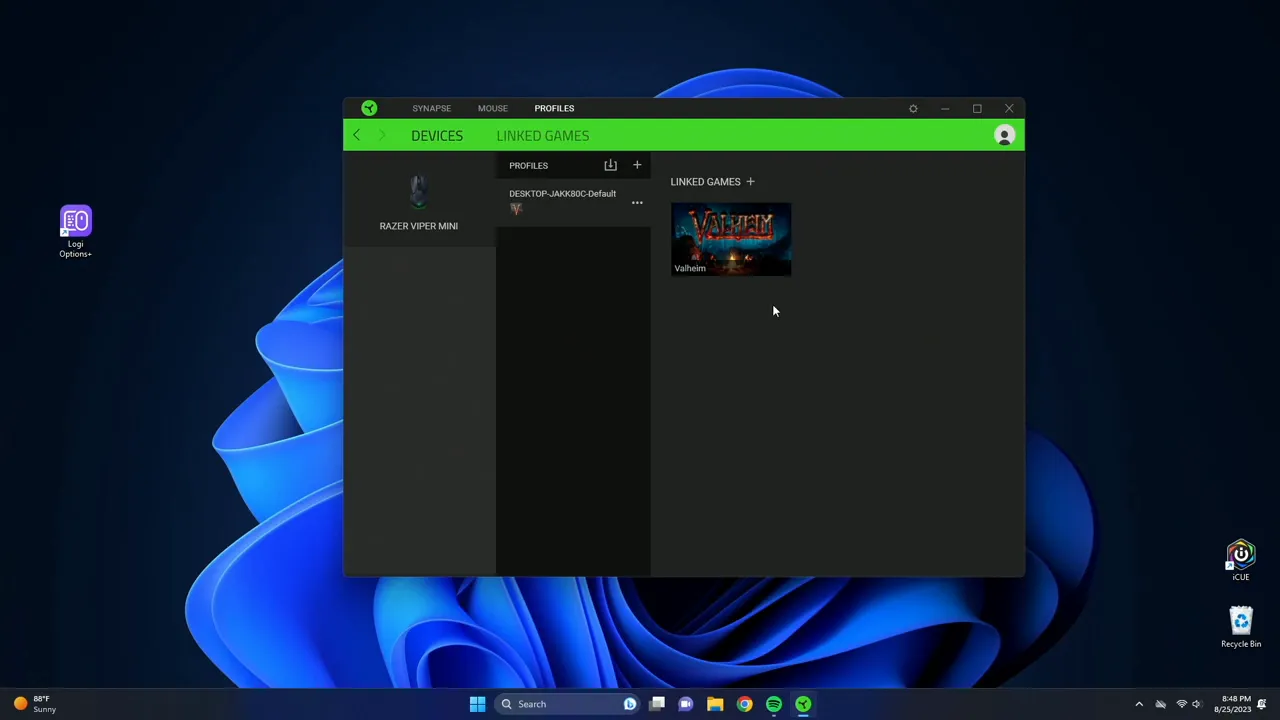
Profiles are especially useful if you use the same mouse for different tasks—productivity, video editing, or multiple games all benefit from unique mappings and sensitivity setups.
Razer Hypershift: a second layer of controls
Hypershift works like a layer switch — when held, every button on your mouse can perform an alternate action. Think of it as doubling your programmable buttons without adding hardware.
- Create a Hypershift map for complex macros or frequently used utilities.
- Combine Hypershift with modifiers and turbo for powerful one-press combos.
When you need more inputs but want to keep your hand movement minimal, Hypershift is the easiest way to expand functionality while keeping everything on the mouse.
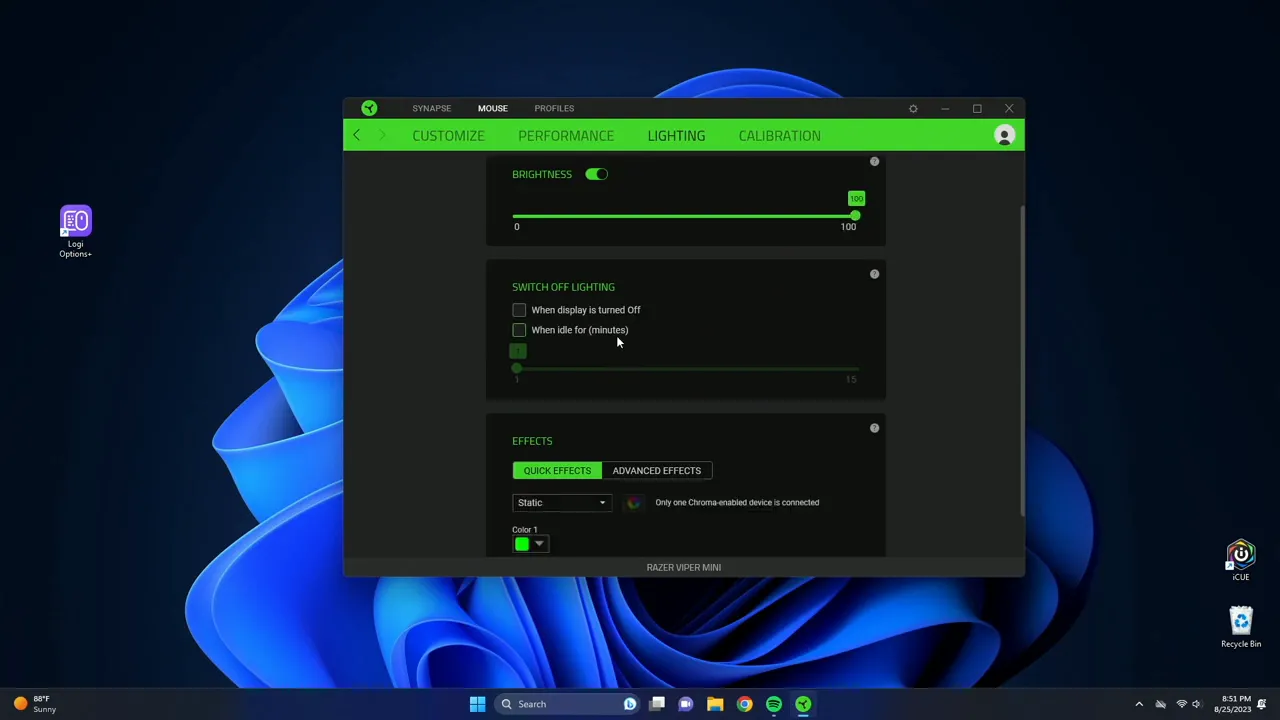
Lighting & Chroma: color, effects and sync
The Lighting tab controls the Viper Mini's RGB. You can set brightness, idle behavior, and choose how the lights behave:
- Brightness — increase or decrease the LED intensity.
- Idle and Display-off timers — set lighting to turn off when the display sleeps or after N minutes of mouse inactivity (up to 15 minutes).
- Effects — static color, breathing, spectrum cycling, and more. For example, set static green or breathing between green and blue.
- Advanced Effects — sync multiple Razer devices (keyboard, mouse, headset) for unified Chroma lighting.
For a tidy setup, I recommend syncing devices with a subtle breathing or reactive effect rather than full-spectrum cycling — it reduces distraction in long sessions.
Calibration: liftoff distance and pad tuning
Calibration is an often overlooked but powerful feature. Synapse can tune the mouse's liftoff distance to a specific Razer mouse pad (like the Firefly). This preserves tracking precision when you lift and re-position the mouse, reducing unwanted cursor movement during lifts.
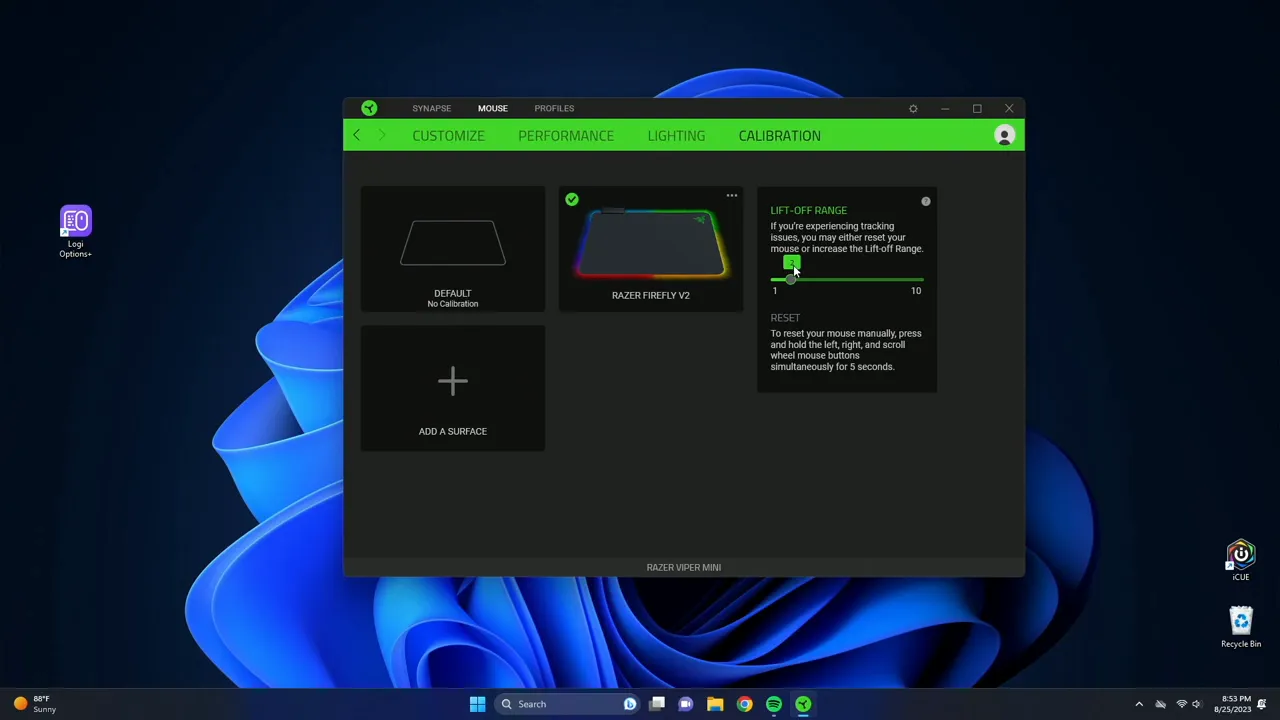
Matching the mouse to your pad gives a more consistent feel across lifts and placements — something that can matter in fast, competitive play.
Utility functions worth trying
Beyond gaming, several Synapse features improve productivity:
- Text function — paste long email signatures or commonly used phrases with a single click. You can even insert emojis and special characters.
- Launch program / Website — start streaming software, voice chat, or a frequently used website instantly.
- Windows shortcuts — map copy, paste, close, or refresh to your thumb buttons for faster workflow.
Use a combination of Hypershift and text functions to build shortcuts that reduce context switching and keep your hands on the mouse and keyboard.
Tips & best practices
- Keep polling rate at 1000 Hz for the most responsive experience.
- Create separate profiles for different games or workflows and bind them to their execs for auto-switching.
- Don’t overload DPI stages — pick 2–3 sensible values that match your muscle memory.
- Use Hypershift to add functionality without cluttering your main mappings.
- Calibrate liftoff distance if you use a Razer pad for consistent behavior on lifts.
- Test turbo mode carefully — repeated inputs are powerful but can violate game rules if used to automate prohibited behaviors.
Final thoughts
The Razer Viper Mini paired with Synapse becomes a highly customizable tool. From remapping buttons and setting up Hypershift layers to fine-tuning DPI and RGB, Synapse turns a simple ultralight mouse into a tailored extension of your hands. If you're a gamer looking for quick responsiveness or a power user who wants shortcuts at your thumb's reach, take the time to set up profiles and calibrate the mouse — you'll notice the difference.

Frequently Asked Questions
Do I need Synapse to use the Razer Viper Mini?
No — the mouse will function with default settings out of the box. Synapse is optional software that unlocks programmable buttons, DPI stages, Hypershift, Chroma lighting customization, profile linking, and calibration. If you want advanced control and personal profiles, install Synapse.
What is Hypershift and how should I use it?
Hypershift is a secondary layer of button mappings. When Hypershift is active (usually via a hold key), every button can perform an alternate action. Use it to double the number of accessible inputs without adding hardware — perfect for macros, shortcuts, or less-used functions you still want fast access to.
How many DPI stages should I use?
That depends on your playstyle. Two to three stages are common (e.g., low for precision, medium for general play, high for fast turns). Fewer stages reduce accidental mis-switching and help you build consistent muscle memory. Adjust by testing in-game until movement feels natural.
What polling rate should I set?
Set the polling rate to 1000 Hz for maximum responsiveness. That means the mouse reports position to your PC 1000 times per second, minimizing latency. Lower rates conserve CPU but may introduce noticeable input lag for fast-paced games.
Does calibration really matter?
Yes, if you want consistent liftoff behavior. Calibrating to your Razer mouse pad adjusts liftoff distance so the sensor stops tracking at a predictable height when you lift the mouse. This helps avoid unintended cursor drift during rapid repositioning.
Can I sync lighting across multiple devices?
Yes. The Advanced Effects section lets you sync Chroma lighting across compatible Razer devices (keyboards, mice, headsets). Choose a unified effect for a cohesive look or set different effects per device for visual variety.
Where to go next
If you want a deeper hardware review of the Viper Mini—including build, clicks, and in-hand impressions—I covered that in a dedicated review. Try the Synapse settings above, experiment with DPI and Hypershift, and tweak lighting and calibration to match your playstyle. Enjoy the customization — once it’s dialed in, your mouse becomes noticeably more effective.


